안드로이드 UI
허준영(jyheo@hansung.ac.kr)
화면 크기를 고려한 디자인
- 기기마다 다른 크기, 해상도, 비율
- 크기, 해상도에 따라 이미지 크기를 다르게 사용
- 화면 크기, 비율에 따라 레이아웃을 다르게 구성
- 태블릿은 폰 보다 더 큰 화면
- 더 많은 UI 요소를 포함할 수 있음
- 화면 크기에 따라 UI 요소의 크기도 자동으로 조정
- 프래그먼트(Fragment) 활용
- 기기 방향 변화에 따른 디자인
- 가로 보기와 세로 보기에 따라 다르게 디자인
- 또는 방향을 고정하여 한가지만 디자인
UI요소: Button, EditText, TextView, LinearLayout, …
UI 요소 크기
- 모든 UI요소들은 가로,세로 크기를 지정할 수 있음
- layout_width
- layout_height
- 크기 값으로
- match_parent
- wrap_content
- 특정 값 – 예를 들어 300dp
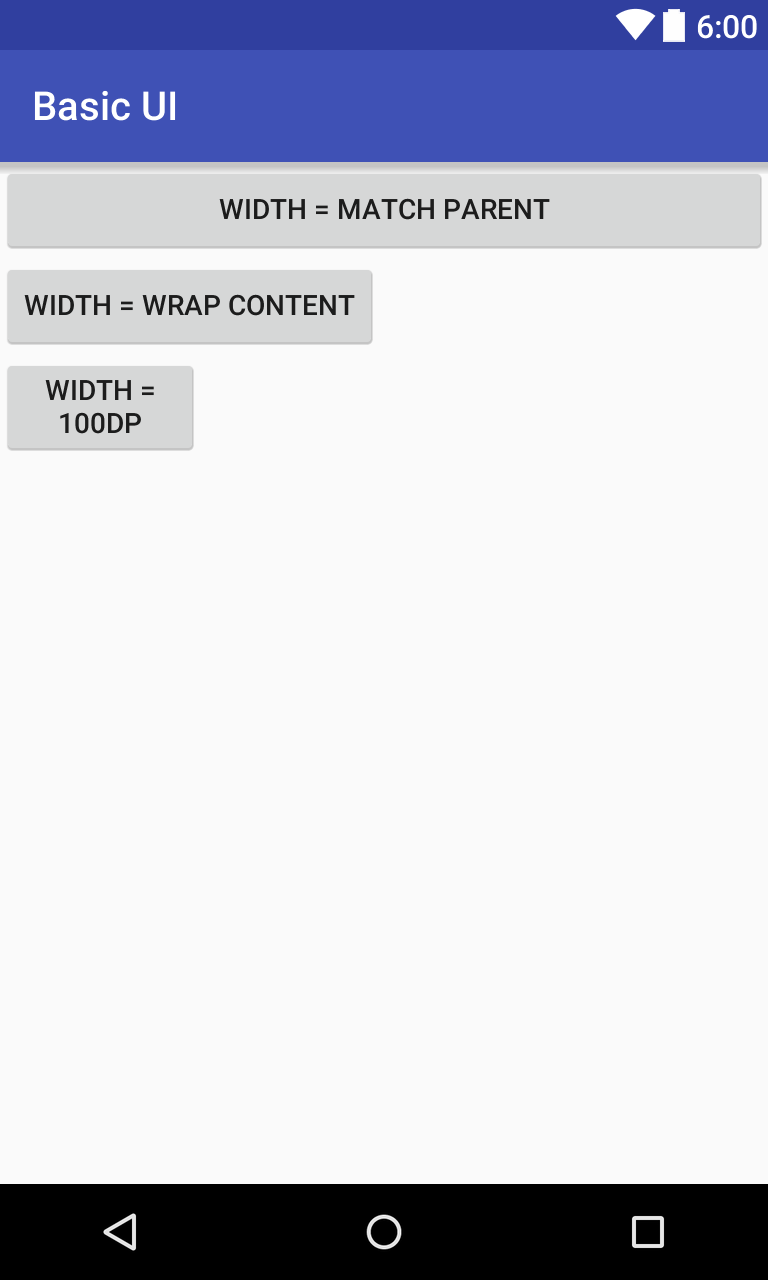
UI 요소 크기 - Example
<Button
    android:layout_width="match_parent"
    android:layout_height="wrap_content"
    android:text="Width = Match Parent"/>

<Button
    android:layout_width="wrap_content"
    android:layout_height="wrap_content"
    android:text="Width = wrap content"/>

<Button
    android:layout_width="100dp"
    android:layout_height="wrap_content"
    android:text="Width = 100dp"/>
https://github.com/jyheo/android-lecture-examples/…
레이아웃(Layout)
레이아웃은 사용자 인터페이스에 대한 시각적 구조를 정의합니다. 예컨대 액티비티 또는 앱 위젯에 대한 UI가 이에 해당됩니다. 출처: https://developer.android.com/guide/topics/ui/declaring-layout.html
- 레이아웃 내에 자식 뷰(UI요소 들)의 배치 방법을 결정함
- 안드로이드에서 모든 UI요소들은 뷰(View)를 상속 받음
- 당연히 자식 뷰 중에 레이아웃이 있을 수 있음(즉, 레이아웃 내에 다른 레이아웃이 존재할 수 있음)
- 레이아웃 종류
- LinearLayout
- RelativeLayout
- FrameLayout, GridLayout, TableLayout
LinearLayout or RelativeLayout
- LinearLayout(선형 레이아웃)
- 자식 뷰들을 하나의 가로 방향 또는 세로 방향 행으로 정리하는 레이아웃

- 자식 뷰들을 하나의 가로 방향 또는 세로 방향 행으로 정리하는 레이아웃
- RelativeLayout(상대 레이아웃)
- 자식 뷰들을 서로 관련지어 나타냄(자식 A가 자식 B의 왼쪽, 자식 C가 자식 B의 왼쪽에 정렬)
- 자식 뷰들을 서로 관련지어 나타냄(자식 A가 자식 B의 왼쪽, 자식 C가 자식 B의 왼쪽에 정렬)
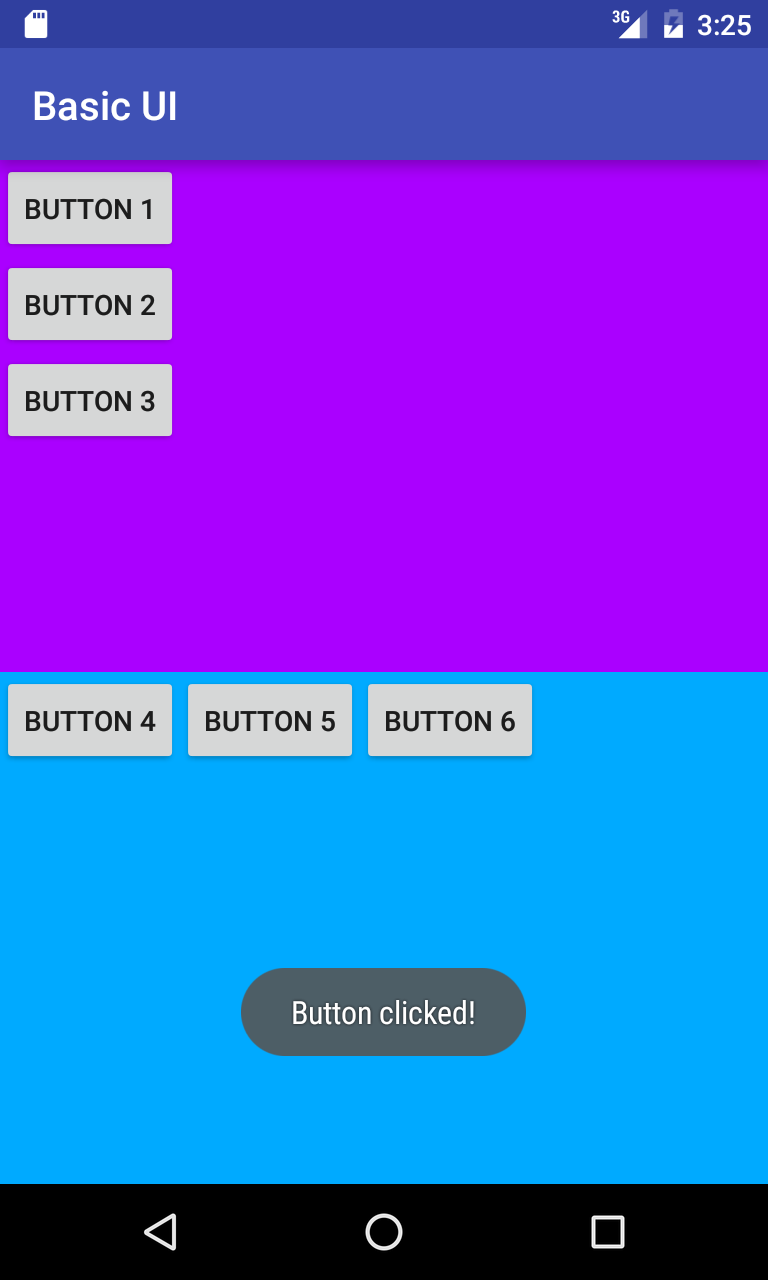
LinearLayout - Example(1/2)
<LinearLayout
    android:layout_width="match_parent"
    android:layout_height="match_parent"
    android:orientation="vertical">

    <LinearLayout
→       android:layout_width="match_parent"
→       android:layout_height="match_parent"
→       android:layout_weight="1"
→       android:orientation="vertical"
        android:background="#aa00ff">
        <Button
            android:layout_width="wrap_content"
            android:layout_height="wrap_content"
            android:text="Button 1"
            android:id="@+id/button1"/>
        <Button
            android:layout_width="wrap_content"
            android:layout_height="wrap_content"
            android:text="Button 2"/>
        <Button
            android:layout_width="wrap_content"
            android:layout_height="wrap_content"
            android:text="Button 3"/>
    </LinearLayout>

    <LinearLayout
→       android:layout_width="match_parent"
→       android:layout_height="match_parent"
→       android:layout_weight="1"
→       android:orientation="horizontal"
        android:background="#00aaff">
        <Button
            android:layout_width="wrap_content"
            android:layout_height="wrap_content"
            android:text="Button 4"/>
        <Button
            android:layout_width="wrap_content"
            android:layout_height="wrap_content"
            android:text="Button 5"/>
        <Button
            android:layout_width="wrap_content"
            android:layout_height="wrap_content"
            android:text="Button 6"/>
    </LinearLayout>

</LinearLayout>
https://github.com/jyheo/android-lecture-examples/…
뷰(View)와 ViewGroup
뷰(View)
- 모든 UI요소들은 뷰(View)를 상속하여 구현
- 윈도우 GUI에서 윈도우(CWnd)와 동일한 개념
- 화면에 표시 가능한 사각형 영역
- 각각의 뷰는 알아서 자신의 내용을 그리고, 이벤트(키보드, 마우스) 처리를 해결
- 세 가지 visibility 상태를 가짐
- Visible
- Gone – 자리 차지도 안함
- Invisible – 자리는 있지만 보이지는 않음
View/ViewGroup으로 UI 구성
- ViewGroup는 View이지만 다른 View를 포함할 수 있는 View
- LinearLayout이나 RelativeLayout도 ViewGroup
- View로 구성된 트리로 UI가 구성됨

자주 사용되는 View(UI요소들)
- Views
- TextView, EditText
- Button
- RadioButton, CheckBox, Switch
- ImageView
- WebView
- ViewStub
- ViewGroups
- ScrollView, ViewPager
- AdapterViews
- Spinner, ListView, GridView
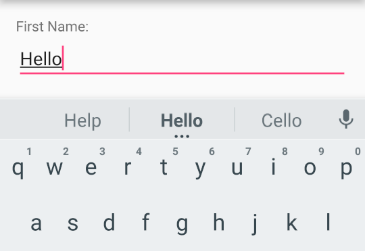
TextView와 EditText
- 기본적인 텍스트 표시/입력 뷰
- TextView – 사용자가 수정할 수 없으나 코드에서 텍스트를 변경할 수 있음
- EditText – 사용자가 입력 가능함
Button
- 일반적으로 많이 사용되는 푸시 버튼
- 버튼내에 텍스트, 아이콘을 표시할 수 있음
- 버튼 전체를 이미지로 그리기 위해서는 ImageButton 사용
- 레이아웃 XML에 버튼 속성으로 onClick에 on-click 이벤트 핸들러를 지정할 수 있음

CompoundButton
- 두 개의 상태를 갖는 버튼
- 체크/미체크, 온/오프
CompoundButton 모양 ToggleButton 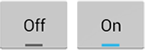
Switch 
CheckBox 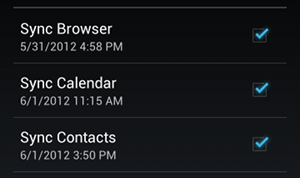
RadioButtons 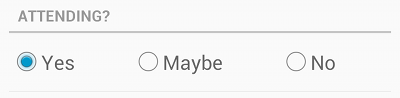
Margin, Padding, Gravity
Margin, padding
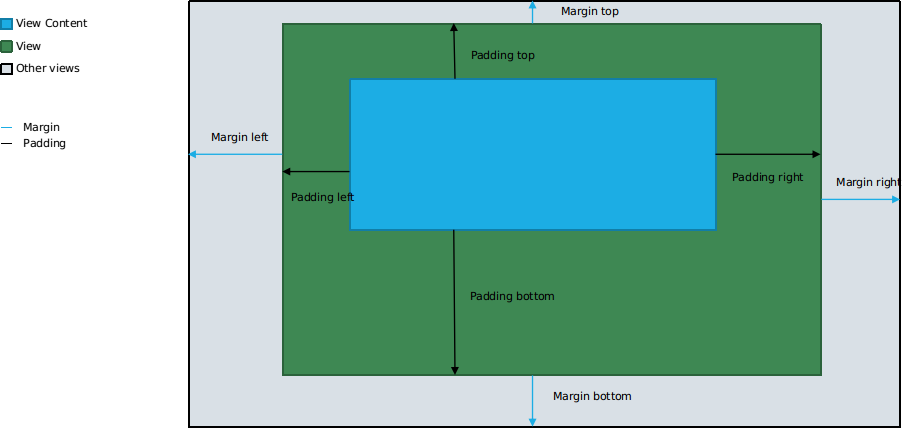
Margin, Padding, Gravity Example
<LinearLayout
    android:layout_width="match_parent"
    android:layout_height="match_parent"
    android:layout_weight="1"
    android:orientation="vertical"
→   android:layout_margin="10dp"
→   android:padding="10dp"
    android:background="#aa00ff">
    <Button
        android:layout_width="match_parent"
        android:layout_height="match_parent"
        android:text="Button"/>
</LinearLayout>
https://github.com/jyheo/android-lecture-examples/…
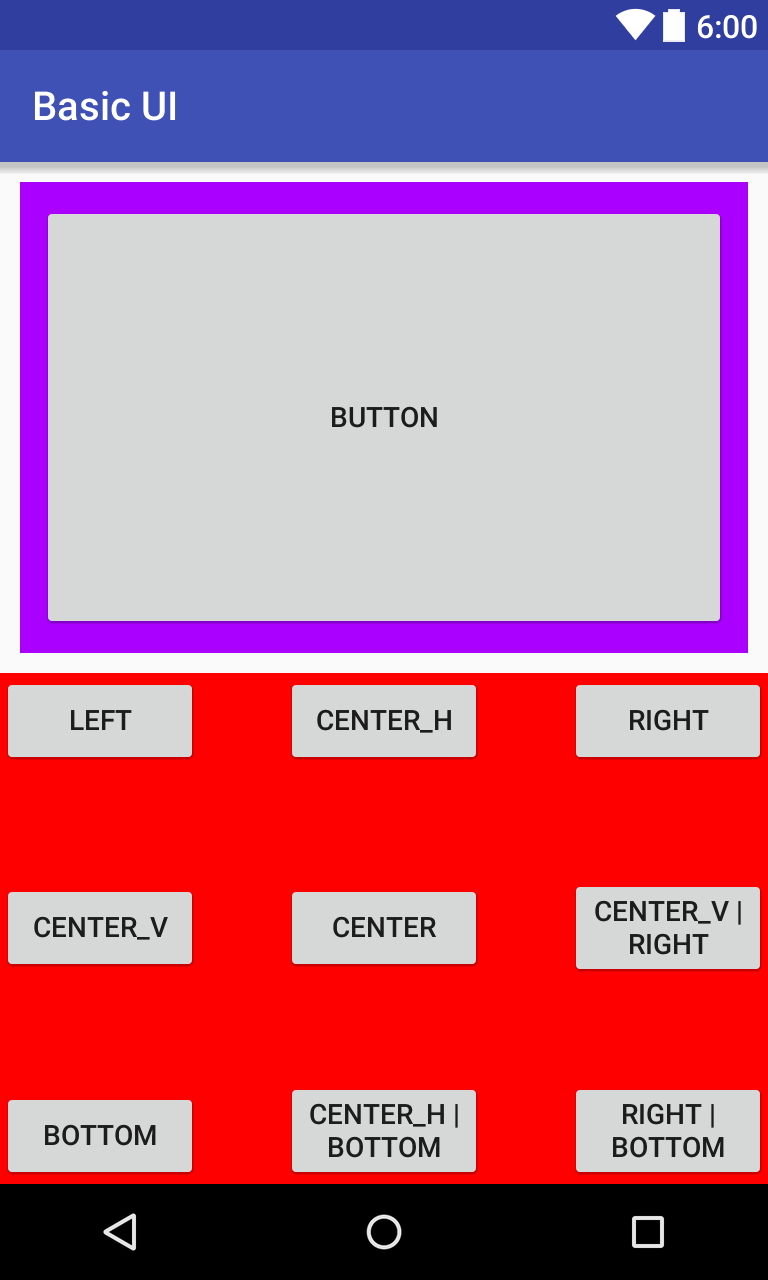
Gravity
- 부모 뷰 안에 포함되는 자식 뷰의 위치를 결정하는 속성
- LinearLayout/FrameLayout의 자식 뷰에서 layout_gravity 속성으로 흔히 사용
- 가능한 값들들
- BOTTOM – 부모 뷰에서 아래쪽에 위치시킴
- CENTER – 부모 뷰의 중앙에 위치시킴
- CENTER_HORIZONTAL – 부모 뷰의 수평 기준으로 중앙에 위치시킴
- CENTER_VERTICAL – 부모 뷰의 수직 기준으로 중앙에 위치시킴
- END – 부모 뷰에서 텍스트 방향의 끝(한글이나 영어의 경우는 오른쪽)에 위치시킴
- LEFT – 부모 뷰에서 왼쪽에 위치시킴
- RIGHT – 부모 뷰에서 오른쪽에 위치시킴
- TOP – 부모 뷰에서 위쪽에 위치시킴
<FrameLayout/>
    <Button android:layout_width="100dp" android:layout_height="wrap_content"
            android:text="Left"
            android:layout_gravity="left"/>
    <Button android:layout_width="100dp" android:layout_height="wrap_content"
            android:text="center_h"
            android:layout_gravity="center_horizontal"/>
    <Button android:layout_width="100dp" android:layout_height="wrap_content"
            android:text="right"
            android:layout_gravity="right"/>
    <Button android:layout_width="100dp" android:layout_height="wrap_content"
            android:text="center_v"
            android:layout_gravity="center_vertical"/>
    <Button android:layout_width="100dp" android:layout_height="wrap_content"
            android:text="Center"
            android:layout_gravity="center"/>
    <Button android:layout_width="100dp" android:layout_height="wrap_content"
            android:text="center_v | right"
            android:layout_gravity="center_vertical|right"/>
    <Button android:layout_width="100dp" android:layout_height="wrap_content"
            android:text="bottom"
            android:layout_gravity="bottom"/>
    <Button android:layout_width="100dp" android:layout_height="wrap_content"
            android:text="center_h | bottom"
            android:layout_gravity="center_horizontal|bottom"/>
    <Button android:layout_width="100dp" android:layout_height="wrap_content"
            android:text="right | bottom"
            android:layout_gravity="right|bottom"/>
</FrameLayout>
이벤트 처리
이벤트 리스너(Event Listeners)
- 이벤트를 처리할 콜백 메소드를 포함하는 인터페이스
- 사용자가 뷰를 사용하여 상호작용할 때 안드로이드 프레임워크에 의해 호출됨
- 버튼을 눌렀을 때 처리
- 리스트 뷰에서 항목을 선택했을 때 처리
- …
Event Listener Interface
- View.OnClickListener – 뷰를 클릭했을 때 콜백
- View.OnLongClickListener – 뷰를 오래 눌렀을 때(롱 클릭) 콜백
- View.OnFocusChangeListener – 뷰에 입력 포커스가 변경됐을 때 콜백
- View.OnKeyListener – 키를 눌렀을 때 콜백
- View.onTouchListener – 뷰를 터치했을 때, 땠을 때 등에 대한 콜백
- View.onCreateContextMenu – 롱 클릭으로 컨텍스트 메뉴가 생성될 때 호출되는 콜백 인터페이스
Event Listener Example
public class MainActivity extends AppCompatActivity {

    @Override
    protected void onCreate(Bundle savedInstanceState) {
        super.onCreate(savedInstanceState);
→       setContentView(R.layout.activity_main);

→       Button btn = findViewById(R.id.button1);
→       btn.setOnClickListener(new View.OnClickListener() {
            @Override
→           public void onClick(View view) {
                Toast.makeText(getApplicationContext(),
                        R.string.button_clicked_msg,
                        Toast.LENGTH_SHORT).show();
            }
        });
    }
}