layout: true .top-line[]
class: center, middle
모바일 백앤드서비스(Firebase)
모바일 백앤드 서비스
- 직접 서버를 설치하여 운영
- 아파치 usergrid: http://usergrid.apache.org
- BAASBOX: http://www.baasbox.com
- BaaS(Backend as a Service) 사용
- Google의 백앤드 서비스 - Firebase
- https://firebase.google.com
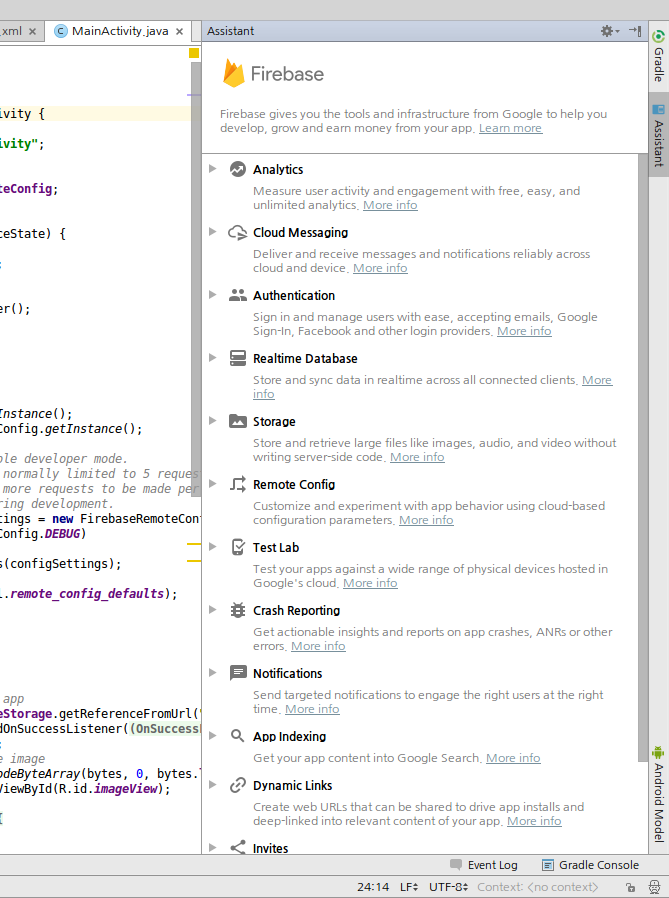
Firebase 기능(개발->성장->수익)

Firebase 시작하기
- Android Studio 2.2 이상 필요
- 구글 계정 필요!
- Tools > Firebase 메뉴 선택
- 오른쪽 같은 Assistant가 생김
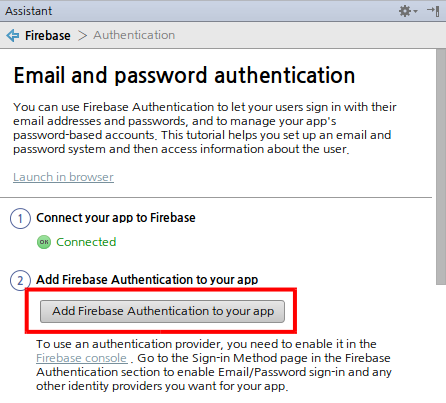
- Authentication 을 선택하고
- Email and password authentication
- 선택
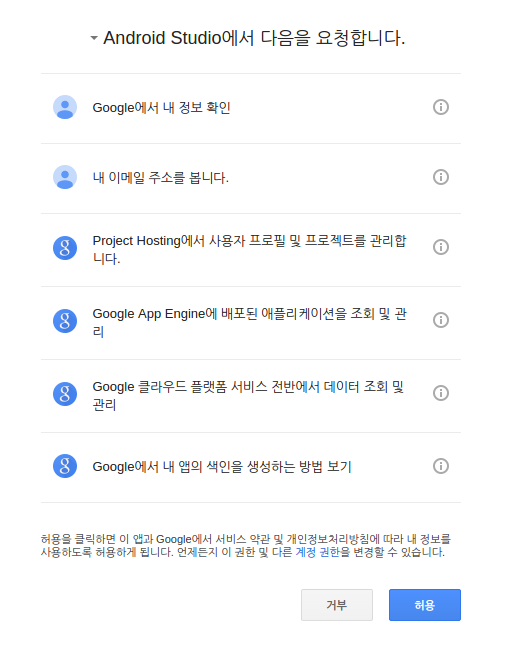
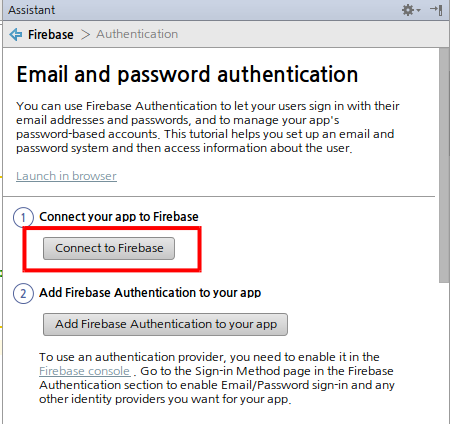
Firebase 시작하기
- Connect to Firebase 버튼
- 권한 요청 페이지가 뜨면 ‘허용'
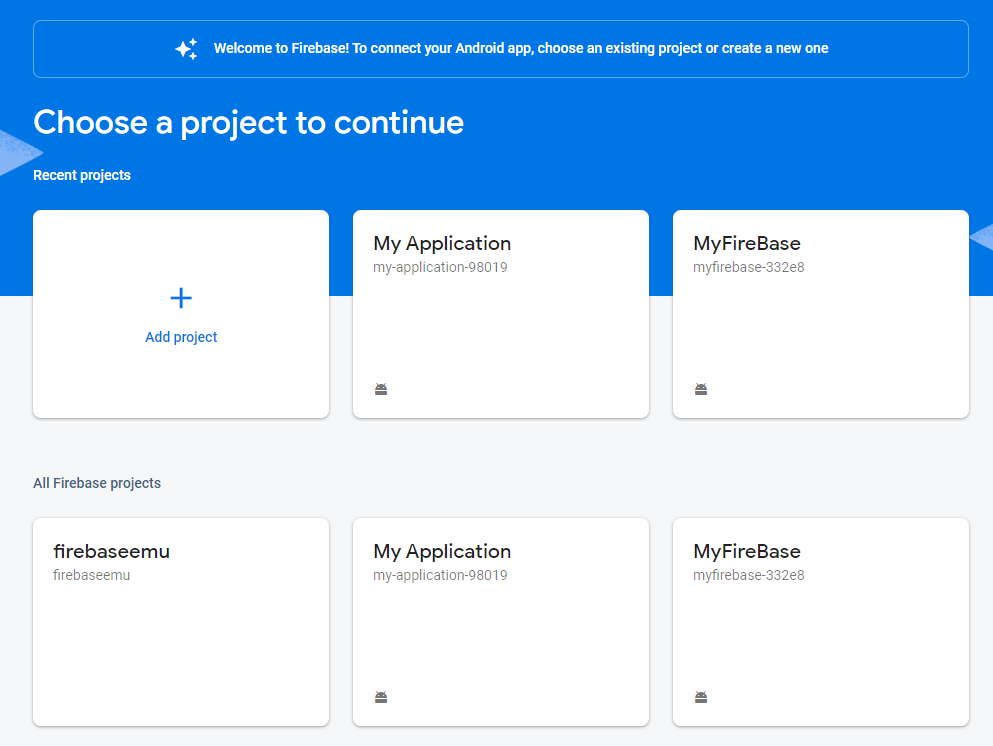
Firebase 시작하기
- 새 프로젝트 이름 입력 하거나
- 기존 프로젝트에서 선택
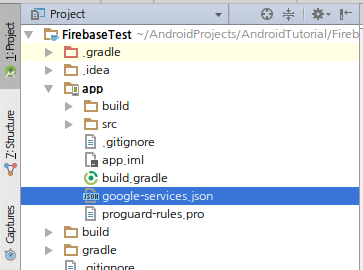
Firebase 시작하기
- Project 보기로 바꾼 후 app 폴더 밑에 보면
- google-services.json 이란 파일이 추가되었음
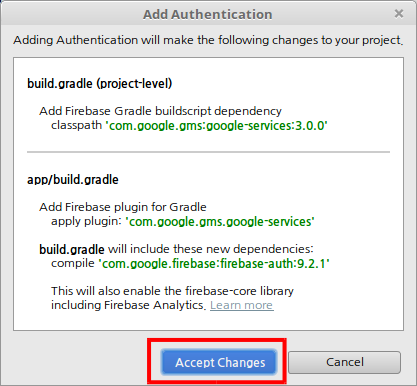
Firebase Authentication
- Add Firebase Authentication to your app 버튼
Authentication
- 인증 객체 가져오기, 인증 상태 리스너
private FirebaseAuth mAuth;
private FirebaseAuth.AuthStateListener mAuthListener;

@Override
protected void onCreate(Bundle savedInstanceState) {
    super.onCreate(savedInstanceState);
    setContentView(R.layout.activity_login);

*   mAuth = FirebaseAuth.getInstance();   // 인증 객체 가져오기

*   mAuthListener = new FirebaseAuth.AuthStateListener() {  // 인증 상태 리스너
        @Override
*       public void onAuthStateChanged(@NonNull FirebaseAuth firebaseAuth) {
            FirebaseUser user = firebaseAuth.getCurrentUser();
            if (user != null) {
                Log.d(TAG, "onAuthStateChanged:signed_in:" + user.getUid());
            } else {
                Log.d(TAG, "onAuthStateChanged:signed_out");
            }
        }
    };
}
.footnote[https://github.com/jyheo/AndroidTutorial/blob/master/FirebaseTest/app/src/main/java/com/example/jyheo/firebasetest/LoginActivity.java#L40-L58]
Authentication
- 인증 상태 리스너 시작/멈춤
@Override
public void onStart() {
    super.onStart();
    mAuth.addAuthStateListener(mAuthListener);
}

@Override
public void onStop() {
    super.onStop();
    if (mAuthListener != null) {
        mAuth.removeAuthStateListener(mAuthListener);
    }
}
.footnote[https://github.com/jyheo/AndroidTutorial/blob/master/FirebaseTest/app/src/main/java/com/example/jyheo/firebasetest/LoginActivity.java#L84-L96]
Authentication
- 로그인 시작
public void onButtonLogin(View v) {
    String email = ((EditText)findViewById(R.id.etEmail)).getText().toString();
    String password = ((EditText)findViewById(R.id.etPassword)).getText().toString();
*   mAuth.signInWithEmailAndPassword(email, password)  // Task 객체 리턴
*       .addOnCompleteListener(this, new OnCompleteListener<AuthResult>() {
            @Override
*           public void onComplete(@NonNull Task<AuthResult> task) {
                Log.d(TAG, "signInWithEmail:onComplete:" + task.isSuccessful());
*               if (!task.isSuccessful()) { // 로그인 실패
                    Log.w(TAG, "signInWithEmail", task.getException());
                    Toast.makeText(LoginActivity.this, "Authentication failed.",
                                Toast.LENGTH_SHORT).show();
                }
            }
        });
}
.footnote[https://github.com/jyheo/AndroidTutorial/blob/master/FirebaseTest/app/src/main/java/com/example/jyheo/firebasetest/LoginActivity.java#L61-L82]
Authentication
- 로그 아웃
FirebaseAuth.getInstance().signOut();
.footnote[https://github.com/jyheo/AndroidTutorial/blob/master/FirebaseTest/app/src/main/java/com/example/jyheo/firebasetest/MainActivity.java#L115-L118]
Authentication
- 테스트를 위해 콘솔에서 계정 생성 가능(https://console.firebase.google.com)
<img src=”images/firebaseconsoleauth.png” width=90%>
Authentication
- 사용자 추가
<img src=”images/firebaseconsoleauth2.png” width=90%>
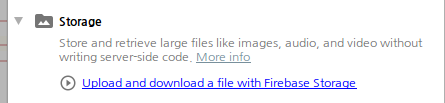
Storage
- 이미지, 오디오, 비디오, 사용자가 생성한 데이터 등을 저장하기 위한 공간
- 유료로 사용하면 백업 기능도 제공
- Firebase Assistant에서 Storage
- Upload and download a file with Firebase Storage 선택
Storage
- 한번 Firebase에 연결했다면, Connected로 나옴
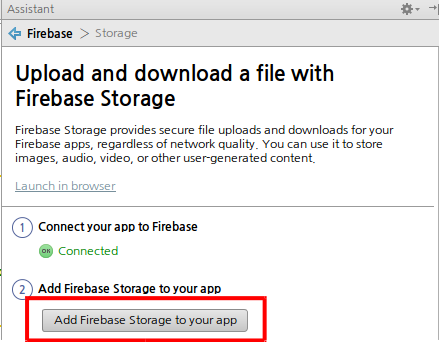
- Add Firebase Storage to your app 버튼 클릭
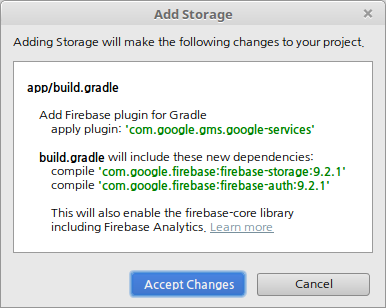
Storage
- Accept Changes
Storage
- 스토리지 객체 가져오기
private FirebaseStorage mFirebaseStorage;

@Override
protected void onCreate(Bundle savedInstanceState) {
    super.onCreate(savedInstanceState);
    setContentView(R.layout.activity_main);

    mAuth = FirebaseAuth.getInstance();
    FirebaseUser user = mAuth.getCurrentUser();

*   if (user == null)  // 인증이 정상적으로 된 사용자만…
        finish();

*   mFirebaseStorage = FirebaseStorage.getInstance();

    ...생략...
}
.footnote[https://github.com/jyheo/AndroidTutorial/blob/master/FirebaseTest/app/src/main/java/com/example/jyheo/firebasetest/MainActivity.java#L36-L44]
Storage
- 스토리지에서 이미지 가져와서 표시하기
private void displayImage() {
*   StorageReference storageRef = mFirebaseStorage.getReferenceFromUrl("gs://myfirebase-332e8.appspot.com/3.jpg");
*   storageRef.getBytes(Long.MAX_VALUE).addOnSuccessListener(new OnSuccessListener<byte[]>() {
        @Override
        public void onSuccess(byte[] bytes) {
            Log.d(TAG, "getBytes Success");
            // Use the bytes to display the image
            Bitmap bmp = BitmapFactory.decodeByteArray(bytes, 0, bytes.length);
            ImageView iv = (ImageView)findViewById(R.id.imageView);
            iv.setImageBitmap(bmp);
        }
    }).addOnFailureListener(new OnFailureListener() {
        @Override
        public void onFailure(@NonNull Exception exception) {
            Log.d(TAG, "getBytes Failed");
        }
    });
}
.footnote[https://github.com/jyheo/AndroidTutorial/blob/master/FirebaseTest/app/src/main/java/com/example/jyheo/firebasetest/MainActivity.java#L62-L81]
Storage
- Firebase 콘솔을 이용하여 스토리지에 파일 업로드
<img src=”images/firebaseconsolestorage.png” width=70%>
Storage
- 스토리지의 파일 접근 권한 설정
- 기본적으로 인증 후에 Storage에 접근이 가능함
- 공개로 하려면 allow read, write; 로 수정
<img src=”images/firebaseconsolestoragerule.png” width=90%>
Remote Config
- 앱의 동작을 원격 클라우드에서 변경할 수 있음
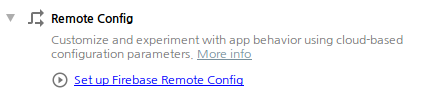
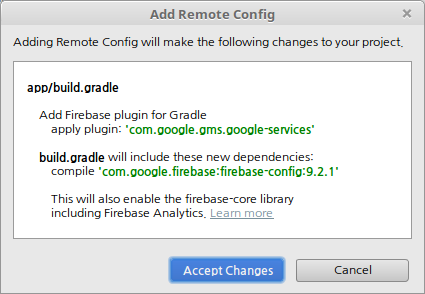
Remote Config
private FirebaseRemoteConfig mFirebaseRemoteConfig;

@Override
protected void onCreate(Bundle savedInstanceState) {
    super.onCreate(savedInstanceState);
    setContentView(R.layout.activity_main);

    mFirebaseRemoteConfig = FirebaseRemoteConfig.getInstance();

    FirebaseRemoteConfigSettings configSettings = new FirebaseRemoteConfigSettings.Builder()
*           .setDeveloperModeEnabled(BuildConfig.DEBUG)  // 개발자 모드로.
            .build();
    mFirebaseRemoteConfig.setConfigSettings(configSettings);
    mFirebaseRemoteConfig.setDefaults(R.xml.remote_config_defaults);

    displayConfig();
}

private void displayConfig() {
    Boolean cheat_enabled = mFirebaseRemoteConfig.getBoolean("cheat_enabled");
    ((TextView)findViewById(R.id.textView_cheat)).setText("cheat_enabled=" + cheat_enabled);
    long price = mFirebaseRemoteConfig.getLong("your_price");
    ((TextView)findViewById(R.id.textView_price)).setText("your_price is " + price);
}
.footnote[https://github.com/jyheo/AndroidTutorial/blob/master/FirebaseTest/app/src/main/java/com/example/jyheo/firebasetest/MainActivity.java#L45-L58]
Remote Config
- 기본 설정 파일 만들기
- New > Android Resource File
- R.xml.remote_config_defaults <img src=”images/firebasercdefault.png” width=80%>
Remote Config
- res/xml/remote_config_defaults.xml
<?xml version="1.0" encoding="utf-8"?>
<defaultsMap xmlns:android="http://schemas.android.com/apk/res/android">
    <entry>
        <key>your_price</key>
        <value>100</value>
    </entry>
    <entry>
        <key>cheat_enabled</key>
        <value>false</value>
    </entry>
</defaultsMap>
.footnote[https://github.com/jyheo/AndroidTutorial/blob/master/FirebaseTest/app/src/main/res/xml/remote_config_defaults.xml]
Remote Config
- Firebase에서 설정 가져오기
public void onFetchButton(View v) {
    long cacheExpiration = 3600; // 1 hour in seconds.
*   // 개발자 모드에서는 cacheExpiration을 0으로 해서 매번 서버로부터 가져오게 함.
*   // 개발자 모드가 아니면 자주 RemoteConfig를 가져올 수 없음.
    if (mFirebaseRemoteConfig.getInfo().getConfigSettings().isDeveloperModeEnabled()) {
        cacheExpiration = 0;
    }

*   mFirebaseRemoteConfig.fetch(cacheExpiration)
            .addOnCompleteListener(new OnCompleteListener<Void>() {
                @Override
                public void onComplete(@NonNull Task<Void> task) {
                    if (task.isSuccessful()) {
                        Log.d(TAG, "Fetch Succeeded");
                        // Once the config is successfully fetched it must be activated
                        //  before newly fetched values are returned.
*                       mFirebaseRemoteConfig.activateFetched();
                    } else {
                        Log.d(TAG, "Fetch failed");
                    }
                    displayConfig();
                }
            });
}
.footnote[https://github.com/jyheo/AndroidTutorial/blob/master/FirebaseTest/app/src/main/java/com/example/jyheo/firebasetest/MainActivity.java#L90-L113]
Remote Config
- Firebase 콘솔에서 설정 만들기
<img src=”images/firebaseconsolerc.png” width=90%>
Notification
- 특정 대상에게 알림을 보낼 수 있음
- 특정 시간을 정해서 보낼 수 있음
- 사용자에게 앱의 사용을 유도하는 용도
- 이벤트 알림 등


Notification
- AndroidManifest.xml 에 서비스와 인텐트 필터 추가
<service
    android:name=".MyFirebaseMessagingService">
    <intent-filter>
        <action android:name="com.google.firebase.MESSAGING_EVENT"/>
    </intent-filter>
</service>
.footnote[https://github.com/jyheo/AndroidTutorial/blob/master/FirebaseTest/app/src/main/AndroidManifest.xml#L19-L23]
Notification
- 메시지 수신 서비스
public class MyFirebaseMessagingService extends FirebaseMessagingService {
    @Override
    public void onMessageReceived(RemoteMessage remoteMessage) {
        Log.d(TAG, "From: " + remoteMessage.getFrom());

        // Check if message contains a data payload.
        if (remoteMessage.getData().size() > 0) {
            Log.d(TAG, "Message data payload: " + remoteMessage.getData());
        }

        // Check if message contains a notification payload.
        if (remoteMessage.getNotification() != null) {
            msgBody = remoteMessage.getNotification().getBody();
            Log.d(TAG, "Message Notification Body: " + msgBody);
        }
    }
.footnote[https://github.com/jyheo/AndroidTutorial/blob/master/FirebaseTest/app/src/main/java/com/example/jyheo/firebasetest/MyFirebaseMessagingService.java#L12-L35]
Notification
- Firebase 콘솔에서 알림 보내기
- Firebase 콘솔에서 Notification 메뉴 선택 <img src=”images/firebaseconsolenoti.png” width=80%>
Notification (앱에서 알림 받기)
- 액티비티가 활성화 된 상태일 때
- FirebaseMessagingService의onMessageReceived()가 호출됨
- 액티비티가 비활성화 된 상태일 때
- 시스템이 자체적으로 알림을 표시함
- 알림을 선택하면 액티비티를 활성화 시킴

Cloud Messaging
- 일반적으로 푸시 알림으로 알려진 서비스
- 클라이언트가 서버로부터 업데이트된 정보를 가져오려면
- 주기적으로 서버에 접속해서 확인하는 방법
- 서버가 클라이언트에 접속해서 알려주는 방법(이 방법은 일반적이지 못함, 클라이언트가 접속을 허용하지 않는 경우가 대부분)
- 누가 서버에 접속하는가?
- 스마트폰의 여러 앱이 각자 알아서 주기적으로 서버에 접속하면?
- 하나의 알림 서버에 시스템이 접속해서 모든 앱이 필요한 업데이트 정보를 확인해준다면? -> Firebase Cloud Messaging
Cloud Messaging
- Firebase Cloud Messaging (FCM)
- 옛날엔 Google Cloud Messaging (GCM)
<img src=”https://i.imgur.com/9XzwPqc.png” width=80%>
.footnote[출처: https://guides.codepath.com/android/Google-Cloud-Messaging]
Cloud Messaging
1. Firebase 서버에 접속하여 토큰을 받음
<img src=”http://imgur.com/5UPxP3n.png” width=80%>
.footnote[출처: https://guides.codepath.com/android/Google-Cloud-Messaging]
Cloud Messaging
2. 받은 토큰을 가지고 3rd party 서버에 접속
<img src=”http://imgur.com/ItRPQ7N.png” width=80%>
.footnote[출처: https://guides.codepath.com/android/Google-Cloud-Messaging]
Cloud Messaging
3. 3rd party 서버가 Firebase 서버를 통해 앱으로 푸시 알림 보냄
<img src=”http://imgur.com/adiFo8w.png” width=80%>
.footnote[출처: https://guides.codepath.com/android/Google-Cloud-Messaging]
Cloud Messaging (안드로이드 앱)


Cloud Messaging (안드로이드 앱)
- AndroidManifest.xml 에 서비스와 인텐트 필터 추가
- Notification의 MyFirebaseMessagingService와 동일
<service
    android:name=".MyFirebaseMessagingService">
    <intent-filter>
        <action android:name="com.google.firebase.MESSAGING_EVENT"/>
    </intent-filter>
</service>

<service
    android:name=".MyFirebaseInstanceIDService">
    <intent-filter>
        <action android:name="com.google.firebase.INSTANCE_ID_EVENT"/>
    </intent-filter>
</service>
.footnote[https://github.com/jyheo/AndroidTutorial/blob/master/FirebaseTest/app/src/main/AndroidManifest.xml#L24-L28]
Cloud Messaging (안드로이드 앱)
- 토큰 업데이트 서비스
- 토큰은 사용자가 앱을 다시 설치하는 등의 이유로 재 생성될 수 있음
- FCM SDK가 생성한 토큰을 받기
- FirebaseInstanceId.getInstance().getToken();
- 토큰 생성 모니터링을 위한 서비스 – 변경될 때만 호출됨
public class MyFirebaseInstanceIDService extends FirebaseInstanceIdService {
    private static final String TAG = "MyFirebaseIIDService";

    @Override
    public void onTokenRefresh() {
        // Get updated InstanceID token.
        String refreshedToken = FirebaseInstanceId.getInstance().getToken();
        Log.d(TAG, "Refreshed token: " + refreshedToken);

        // sendRegistrationToServer(refreshedToken);
    }
}
.footnote[https://github.com/jyheo/AndroidTutorial/blob/master/FirebaseTest/app/src/main/java/com/example/jyheo/firebasetest/LoginActivity.java#L37-L38 https://github.com/jyheo/AndroidTutorial/blob/master/FirebaseTest/app/src/main/java/com/example/jyheo/firebasetest/MyFirebaseInstanceIDService.java#L12-L24]
Cloud Messaging (3rd Party 서버)
- 3rd Party 서버 만들기
- 앱이 접속하여 메시지를 주고받는 서버
- 앱은 구글 서버에서 받은 토큰을 이용하여 서버에 등록
- 서버는 앱에게 푸시 메시지를 보낼 필요가 있을 때(앱이 접속이 안되어 있는 경우 등) 구글 서버를 통해 푸시(앱이 등록한 토큰 이용)를 보냄
Cloud Messaging (3rd Party 서버)
- Curl을 이용하여 서버 없이 메시징 테스트
curl –header “Authorization: key=AIzaSyC3-Rz5MiJmWxBy78io0SG4HYHwPJbTsL0” –header Content-Type:”application/json” https://fcm.googleapis.com/fcm/send -d “{ "notification": { "title": \“title here", "text": \“message body here" }, "to" : "edGuBDxqN4o:APA91bG3pEr0EOIZcSskSvPviMm0yzvulS-DehnaN16wGeGqoMCbt-ZLgZn26fe0S4PVKluJOZDVkYsZecA_VeDvT0Fe-6XI8MZsM5FqN3XJX6o_LnSmAbXt3JwVGCiYuWP9ioyTk8lO"}”
- Authorization: key는 firebase console (https://console.firebase.google.com) 에서 프로젝트 설정 > 클라우드 메시징에서 확인 가능 (Firebase Cloud Messaging 토큰)
- To의 값은 앱에서 등록한 토큰
- FirebaseInstanceId.getInstance().getToken()의 리턴 값